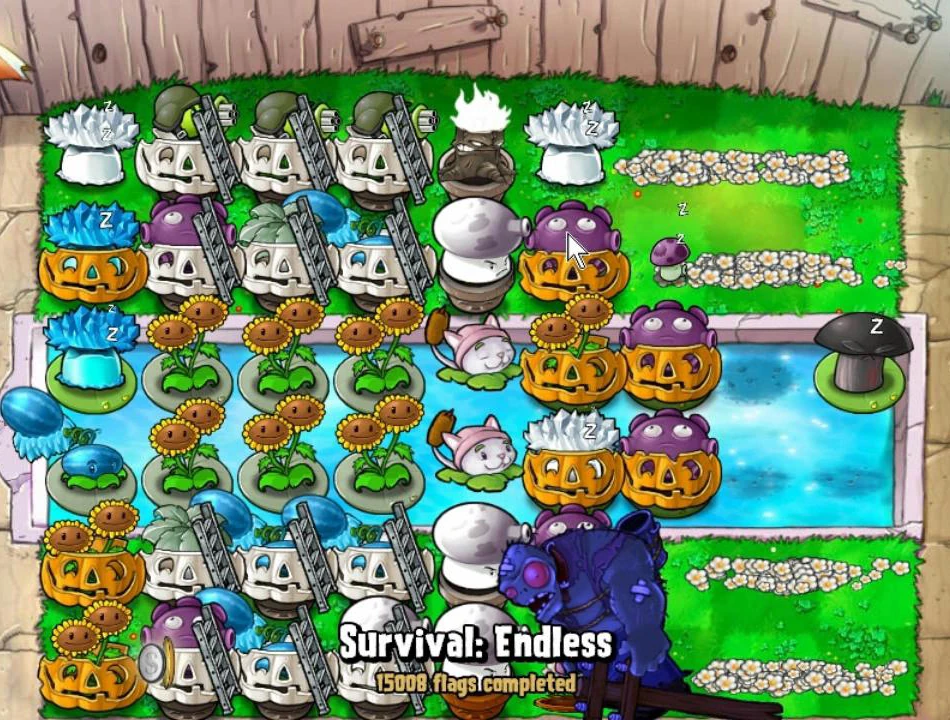
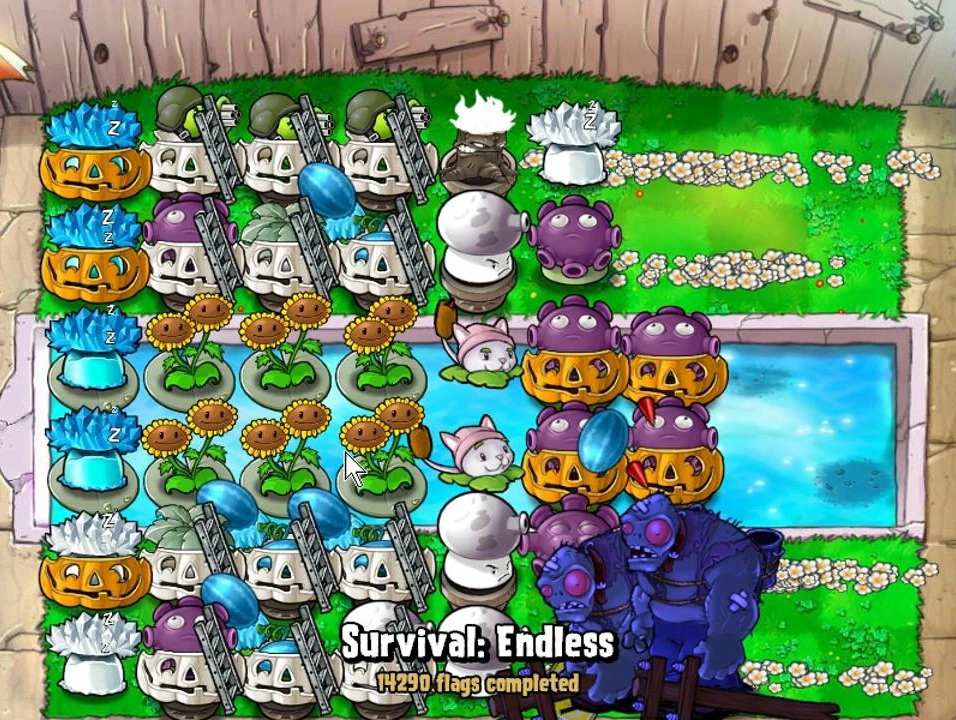
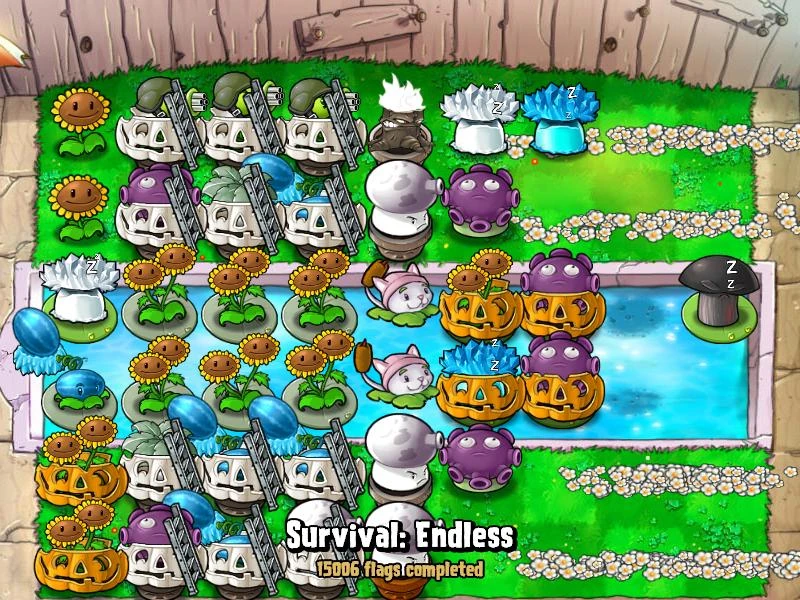
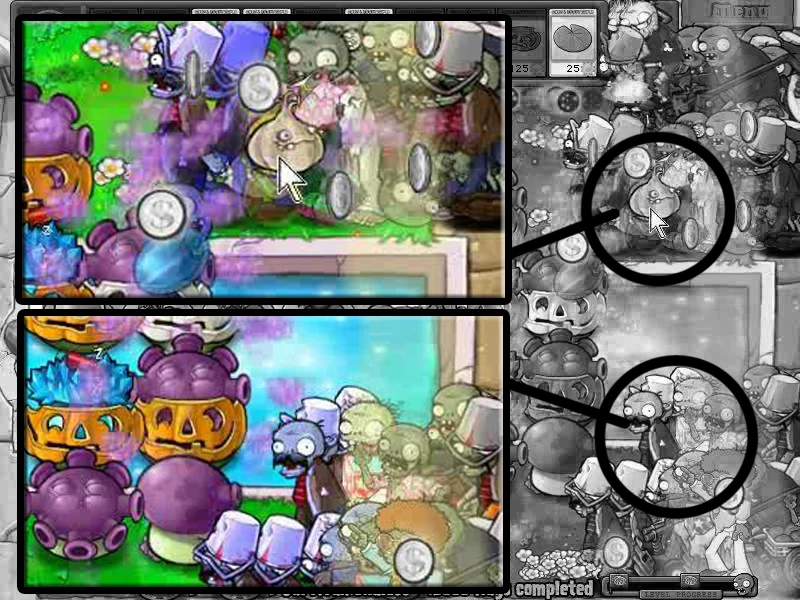
4 Pool Gloom Version. this is definitely safer than the 2 Pool Gloom Version
There are a lot of Strategies out there that can really survive endlessly for Survival Endless but here I'll try to show most of the strategies i used in order to come up with this Setup.
This is not the best setup because there are always better strategies out there that has much more simple strategy and is much more manageable than this. ti lox
This is the result of my attempt to see how far can I really go when it comes to using a cobless setup on Survival Endless. I will do my best to explain every single strategy that was used in order to make this setup a "damageless" cobless Setup.
I dedicate this page
to draco89123 who really did a very good guide and helped me every step of the way.
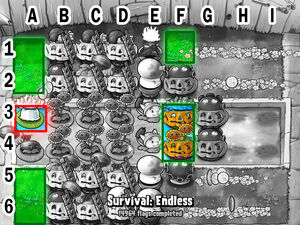
Specifications:[]
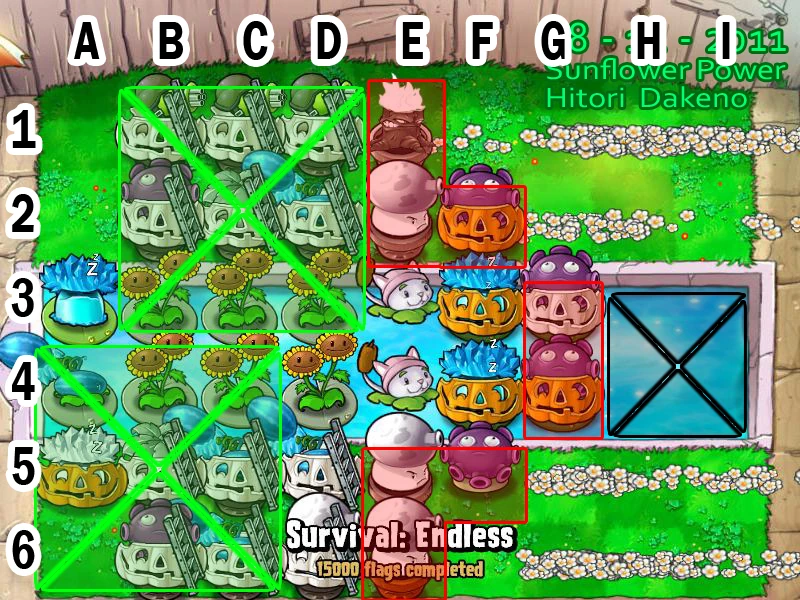
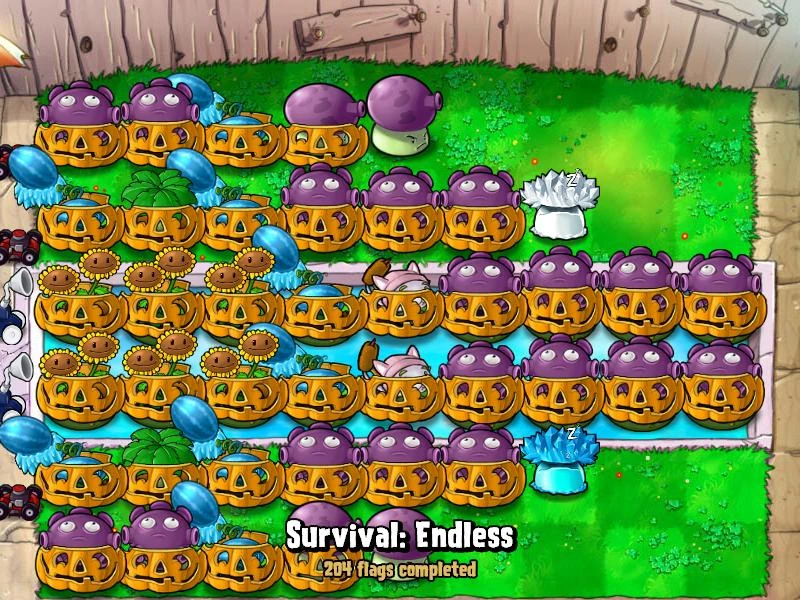
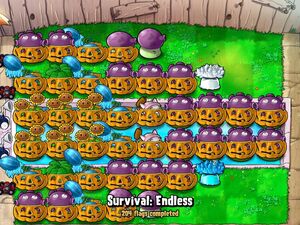
This is a Laddered Setup which means i used ladders to make certain plants immune to certain zombies that would normally bite the pumpkin.
Half Fume-pult Half Gatling Pea Setup
This setup varies it pace depending on the Zombies present on the round
Fast paced round are rounds with no gigas or gargantuars which means the next wave arrives faster which makes Zombonis and jacks much more dangerous
Slow Paced rounds are rounds with Gigas or gargantuars and the next wave arrives much later as compared to fast paced rounds . this causes gigas and gargantuars to stack up
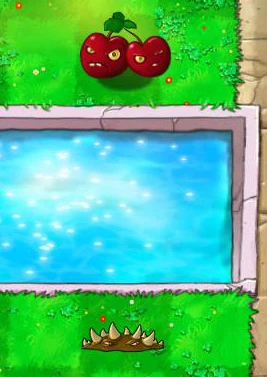
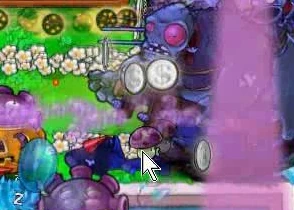
only row 6 is considered safe against Zombonis and jacksthumb|300px|right
Cattails placed at a fairly sweet spot to handle Baloon Zombies pretty well.
7 Extra spaces that can be used depending on the Situation.
not completely safe against Bungee Zombies.
row 2 is not completely safe against football Zombies and even Pole-Vaulting Zombies.
empty Slots A1, A2 and A3 are not safe against Bungees or Catapult Zombies.
RED - i refer to them as the "core" of the setup, these plants must be kept safe always.
GREEN - perfectly safe against Bungees, Catapults and Imps.
BLACK - Empty Slots For Doom Shrooms.
Glooms at F2 and F5 are both not safe against Zombonis, Football Zombies, Jack-in-The-Box Zombies, Gargantuars, Giga-Gargantuars and Pole-Vaulting Zombies.
If Slots F3 and F4 are both empty, then you no longer need to worry about Dolphin-Rider Zombies.
Slots E1 and E6 are both not safe against Football Zombies, Gargantuars and Giga-Gargantuars.
DPS from plants alone are not enough to handle Gargantuars and Giga-Gargantuars.
Overall This Setup cannot really stand on it's own and others would initally refer to as a "weak" setup.
Overview[]
My Goal for this Page is to be able to compile all the strategies i use that makes this setup a "damageless" setup which means None of the plants can be damaged in whatever possible way thus eliminating the need to bring Fume Shrooms and Gloom Shrooms.
Since This Setup Revolves around Instants Here's a few important information about the Setup.
Name
Recharge Time
Priority
Squash
30 Seconds
High
Ice Shroom
50 Seconds
High / Normal
Doom Shroom
50 Seconds
High / Low
Cherry Bomb
50 Seconds
Normal / Low
Spikeweed
7 Seconds
High
Puff Shrooms
7 Seconds
High
Lily Pad
7 Seconds
Very High
Cofee Bean
7 Seconds
Very High
Flower Pot
7 Seconds
Very High
Very High - Their usage must be prioritized over anything else. they should be used anytime, anywhere, and whenever possible.
High - They follow a certain pattern for a certain situation and their timings must be maintained in any possible way
Normal - They are used as backup for certain Instants/ Strategies if in case certain unexpected event occur
Low - Their usage can be bypassed and can easily be compensated using other alternative strategies
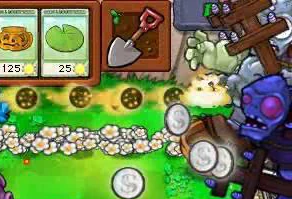
Sun Supply
Sunflowers Needed
Remarks
9990 - 7500
12
Safe Zone
6000 - 7475
16
very often especially if there are a lot of
rounds with Zombonis or Gigas
4000 - 5975
18
rare but Still Worth Noticing
0 - 3975
20-22
very rare but with 20 worth of sunflowers available
this should be enough to increase sun for the next round
Twin Sunflowers are considered two Sunflowers worth of Sun Income
another Important factor that affects sun supply is the time required to finish a certain round .
Zombie
Priority
Pole Vaulting Zombie
Very High
Zomboni
Very High
Football Zombie
High
Giga-Gargantuar
High
Snorkel Zombies
High
Dolphin Rider
High
Jack-In-The-Box Zombie
Normal
The Rest
Low
This is how i prioritize the Zombies for this Strategy based on how dangerous they are for the Setup
Very High - These Zombies Restrict me from making the most of the empty spaces on the lawn and will force me to either use a pumpkin or an Instant
High - These are the usual threat but can be easily manageable thru timing of Instants alone
Low - These Zombies can be ignored and a round that is full of them are considered "Bonus Rounds".
I can only say stuff based on my experience on using cobless setups that i used so i hope this helps you out.
Strategies[]
Sunflower Strategies[]
9 twin Sunflowers and two Sunflowers and is ready for the next round
This is one of my favorites and since i can still apply the strategy here even after improving on some things based on how i handle a setup.
A lot of people tell me. " dude you use up a lot of sun just for a single round . what a noob "
First of all,if you had seen all the setups that i had studied you will notice a lot of similarities.all rounds that has no giga, jacks and football zombies are all called "bonus rounds" . i call them bonus rounds because that's the time i pump up the amount of sun i have by:
On rounds with no zombonis and jacks, flowerpot + puff shrooms are enough to delay football, gigas and gargs. with flowerpot acting as an "extra" puff in terms of recharge time it really works well even on rounds with gigas. alternatively. by making sure gigas WILL be stuck at a spot with HIGHEST DPS thru puffs and flowerpot then these gigas will just be gathered at one spot where you may just hit them with instants or keep on delaying them until they die. an additional sunflower will help you regain sun by planting sunflowers on extra safe spaces IF YOUR setup ignores zombonis then you can use this strategy even on rounds with zombonis
Can be used on rounds with no gigas ... with no gigas to delay . you can now leave puffs behind and bring the twin sunflower instead :) . my advice is to put twins only on the 1st wave. because twins become more and more expensive. pumpkins may be placed on the frontmost plants if there are no zombonis . this will somehow protect you against football zombies. This strategy focused on gaining sun for the next rounds depending on how long do you plan on keeping the extra twin sunflowers
Can be used if you're feelin lazy and there are no gigas and probably zombonis and if you feel that you have sufficient number of twins on your field,. you may pump up pumpkins on the frontlines and just let the zombies walk . just make sure to support them with ice shrooms and garlic
Garlic + less DPS
Can be used on rounds with no gigas and zombonis ( and probably jacks ) . pretty straightforward. you reduce your plants to help buy more time for you to be able to somehow gain more sun. use garlic to redirect the zombies to a much weaker but still manageable lane.
sometimes i use garlic+lilypad to watch snorkels go back and forth LOL
With 7 Extra Spaces to choose from, you may add as much as 7 twin sunflowers depending on how much sun you need and how risky are you when it comes to gambling if the next round is a bonus round or not.
Pros
Greatly affects the Sun gain depending on the amount of sunflowers / twin sunflowers available and this also shows how flexible the setup is
Cons
Diggers can somehow damage the plants placed on the four empty spaces at the back while dolphin-riders can damage the plants placed on F3 and F4. always make sure that you add reasonable amount of twin sunflowers that can be managed by pumpkins.
Sometimes it is very distracting to see Many Suns scattered around the lawn and sometimes they can cause some errors.
Backup Strategy
Slot F1 and F6 are somehow safe especially on rounds with no Zombonis
Although possible, slot A3 may be used as spot for an extra twin sunflower, just be ready to face the consequence of losing one safe ice shroom slot.
Laddering[]
draco89123's Harmless Setup
I first saw this from draco89123's "Harmless" Setup, a cobless setup that can survive endlessly even if you do not bring pumpkins and it uses a very interesting game mechanic that I do not always see that often .
The Ladder from a ladder Zombie enables zombies to bypass certain obstacles and plants which causes them to simply "walk" over a laddered Plant.
By Placing Ladders on a pumpkin you can make a certain plant immune against most zombies that would normally Bite the pumpkin and this can dramatically reduce pumpkin maintenance.
However you need to be careful because they are always accompanied by other Zombies as well and you should also keep your whole setup safe.
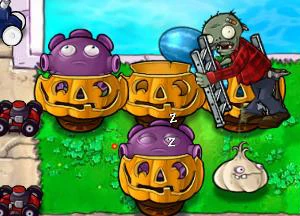
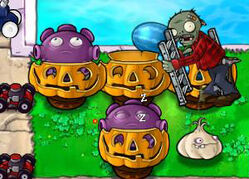
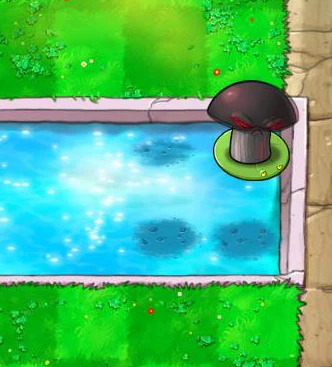
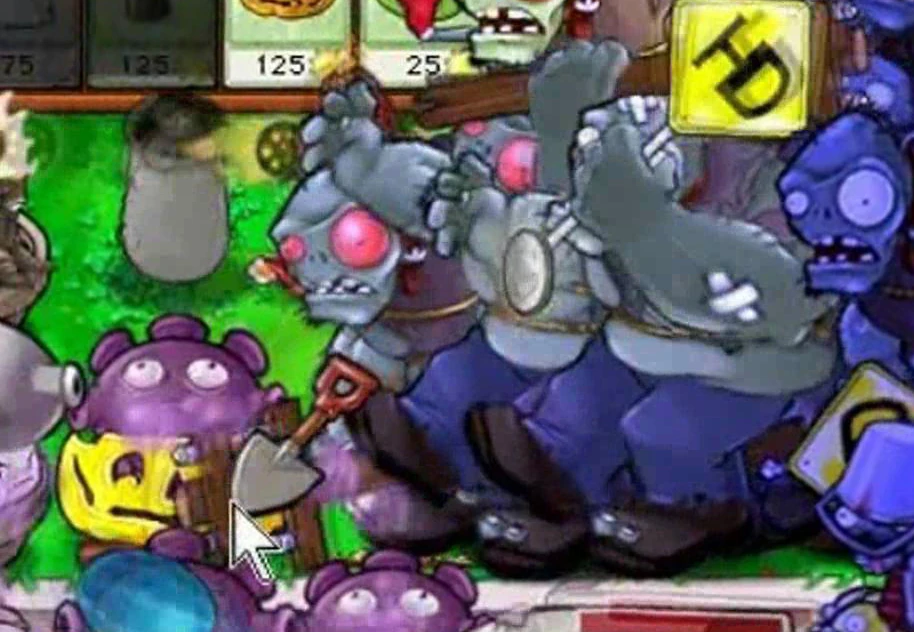
This Gloom that has a laddered pumpkin and is actually enough to handle Imps and since it is placed one tile away from the leftmost tile then it can also eliminate digger Zombies without being touched by either Imp or Digger Zombies.
Since All 4 of these Plants have Ladders, then Imps will only walk over each of the plants without biting any of these plants which means you can now ignore the pumpkin maintenance of these plants which can really help you focus on other strategies for the setup.
Plants can still be hit by Catapult Zombies even if they are in a Laddered Pumpkin so an Umbrella Plant will Solve The Problem.
I really Like This formation because the Umbrella leaf can also protect plants placed on the empty spaces against Catapult Zombies, Imps and sometimes even against Diggers
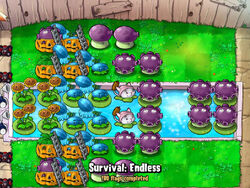
These are the formations I used for the setup
Tips when you want to transition from a non-laddered to a laddered setup
Plan ahead on how you want your setup to look like as a laddered setup
Begin with a un-laddered setup that is somehow relative to what your planned Laddered Setup
You only need 2 Glooms to defend the leftmost part of your lawn against everything except Zombonis, Baloon Zombies, Giga-Gargantuars, Gargantuars and Jack-in-the-Box Zombies. I suggest not doing the transition on rounds with Giga-gargantuars, Gargantuars, Zombonis and Jacks.
I suggest doing this half-your-setup-at-a-time so that you can still keep half of your setup safe while you ladder the other half.
Use garlic to keep the ladder zombies away from lanes that might kill them and try to quickly plant the upgrade plants a few moments before the ladder Zombie place their Ladders
I usually use tall-nuts and garlics to separate Ladder Zombies from the others because i need enough time to keep the pumpkins to be laddered safe everytime an upgrade plant is recharging
You may skip the umbrella plant and reserve it for the next round if you really need that extra 1 slot.
Never forget to defend your pool lanes.
Be creative and have fun.
Try doing this at flags 30+
Remove cattails and use blovers for laddering (blovers if any balloon zombies) to avoid destroyed ladder interference
Prosthumb|300px|rightthumb|300px|right
thumb|right|300px
Allows you to save space as compared to an un-pumpkined version
Very Flexible as it allows you to have more possible formations
Reduces pumpkin maintenance
A lot of sun can be collected in seconds
Cons
These Ladders can be removed by explosives from instants, Jack-in-The-Box Zombies, and other explosive projectiles (Even means launching cobs from Cob Cannons to the spots or too close (1 tile diagonal/above/below) will remove ladders and others within the 3x3 range)
Even if these Plants are laddered, these plants can still be smashed by Gargantuars, Giga-Gargantuars and Zombonis
Diggers May eat a Laddered Pumpkin from Behind
Very tricky to Setup because you need to plan a certain setup and see when you can somehow transition from a non-laddered Setup to a Laddered one.
No Jalapeno can be used
One mistake, and you can screw up the whole setup
Backup Strategy
Sometimes you may need more than one round to rebuild your setup so i suggest only laddering the first 4 plants first then look for another chance to add the next few plants you want to place a laddered pumpkin as well.
I recommend doing the transition at a much later stages ( flags 30+ ) because more ladder zombies appear and this gives you more chance to ladder your plants ( recommended for setups that uses more than 8 laddered plants ).
Always have a backup setup in case you fail to completely ladder the plants the way you planned it.
An empty Laddered pumpkin can still be planted once but if this plant is removed then the ladder is also removed
Placing an umbrella plant on an empty laddered pumpkin will cause the umbrella plant to be planted inside the laddered pumpkin.
Placing any mushroom on an empty laddered pumpkin and then waking it will not remove the ladder on the pumpkin.
Placing a certain plant that can be upgraded ( e.g. fume shroom ) on an empty laddered pumpkin and then upgrading the Fume shroom to a Gloom Shroom will remove the ladder. same happens with melon-pult when upgraded to a winter-pult.
Placing an imitater will not remove the ladder. however if the imitater finish it's transformation the imitated plant will be planted but the ladder of the pumpkin will be removed.
Placing an ice shroom and waking it up will cause the ladder to be removed the moment Ice shroom vanishes.
Placing a squash and let it squash will cause thhe ladder to be removed the moment squash vanishes, just like ice shroom.
Be creative on using garlic in order to keep your pumpkins away from other zombies that may bite them before they are laddered.
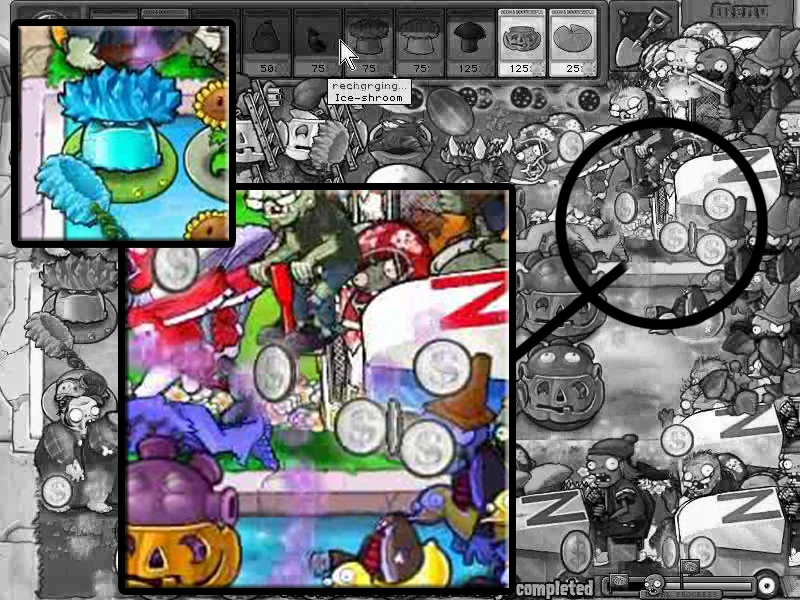
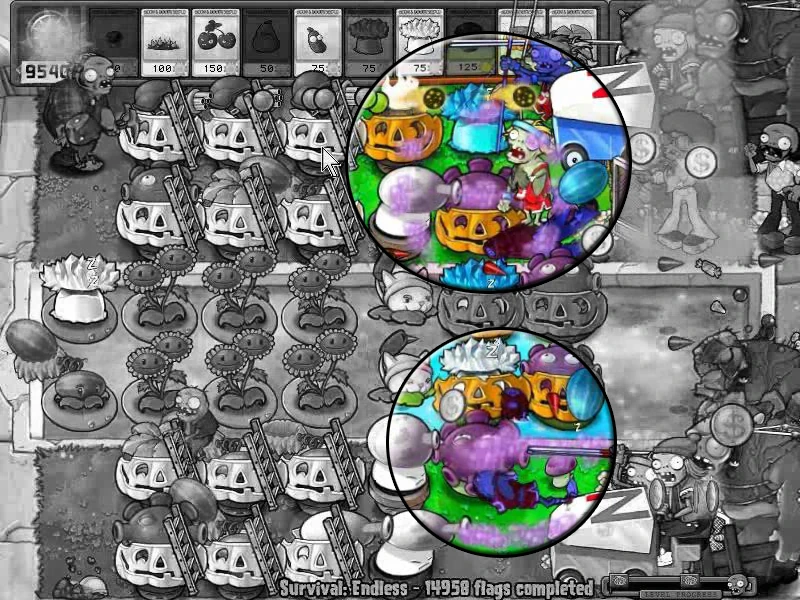
4-Slot Doom Shroom Rotation[]
In order to compensate the DPS for all rows, this Setup used 4 slots dedicated for Doom Shrooms.
Doom Shrooms have 50 second cooldown and craters need 3 minutes to heal which means once a slot is used ; it cannot be used in the next 180 seconds therefore we need 4 slots ( 200 seconds per cycle of 4 Doom shrooms ) to make sure Doom Shrooms will always have a slot to be used everytime it is ready.
Based on my setup, those 4 slots are the slots H3, I3, H4 and I4 .
Pros
Doom Shrooms will hit almost everything located on the columns F to I and even the rightmost spot where they spawn and will boost DPS on all lanes .
Cons
Doom shrooms can be eaten while they are asleep
Doom shrooms can be blasted by jacks even when in the process of exploding
Need to be maintained especially on rounds with Gigas and Zombonis
Sometimes its difficult to spot available slots on the pool especially when there are too many zombies blocking the sight
Backup Strategy
You may use Pumpkin to keep the Doom shroom safe for a short period of time but i really do not recommend stacking up doom shrooms because they are at a very dangerous spot.
Squash + Doom Shroom combo works wonders for me - you use squash to kill the zombies around the lilypad and you plant the Doom shroom while the squash is in mid-air . this will allow you to:
Know exactly where the zombies are located at the same time keep your Doom shroom from being eaten fo a brief period of time
Have a cheaper alternative to pumpkins
If your Doom shroom gets eated either you compensate by using more ice shrooms or a cherry + Ice Combo
Anti-Zomboni Strategies[]
Okay, So This Setup is not safe against Zombonis what should I do? . there are a few things that can be used in order to make this setup safe against Zombonis.
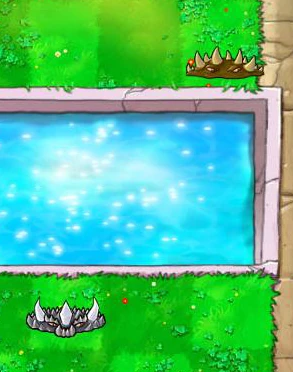
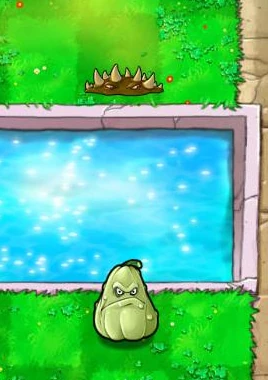
once the spikeweed at I2 is Placed Initially, you may place the next Spikeweed on G5 the moment it recharges
an alternative when there are NO gigas or gargantuars.
you place the spikeweed 1st at I2 then Squash later when the Zombonis touch G5
Squash at I2 then Spikeweed at H5 if spikeweed is not ready when the next wave of Zombonis arrive
This can be used when row1 is in danger of having a lot of stacked zombonis and other Zombies
For Fast arrival of the next wave you immediately use cherry at I2 then after that the next wave will arrive almost Immediately then you can use Squash to take down two waves of Zombonis at once
if you were not able to secure I2 against Zombonis then you can still use H2 as a backup for spikeweed and H5 for squash
the Doom Shrooms will also clear out Zombonis
Pros
Any of these strategies will make sure the rows 2, 5 and 1 are safe against Zombonis, now since row 6 is already safe against Zombonis then the Setup is now safe against Zombonis.
Cons
Panic may cause overreaction so one must stay calm and always be aware of the recharge times of the plants used in order to prepare for the next wave
Backup strategy
These strategies help each other so they are merely backups of one another.
Do NOT depend on Doom shroom alone.
Anti-Jack Strategies[]
So Almost everyone who plays Survival Endless Hates Them. They are simply one of the reasons you might actually fail at survival endless because they explode while destroying plants at a certain radius around it.
we all know they explode. but is it really that random that we cannot somehow find a way to manage when and where they explode? here's a video that shows a test regarding Jack-in-The-Box Explosions.
In here we can clearly see that Jacks will explode and they are most likely to explode even before reaching the end of the lawn.
and we can clearly see where will they most Likely to explode. if they are not slowed.
The Test Shows These Results ( based on my Observations ) for unslowed Jacks
A
B
C
D
E
F
G
H
I
Very High
Very High
High
Low
very low
very low
very low
Low
Low
which means that there is a certain "Middle Ground" where the probability of them exploding is Very Low
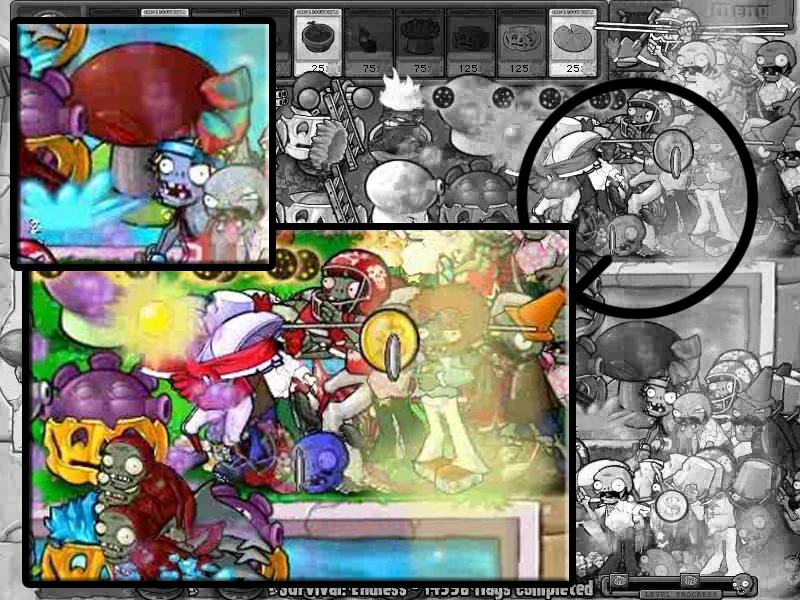
One way to handle Jacks is By using Ice Shrooms, Depending on your Setup then the timing for Ice shrooms May vary but as you can see, I time the cofee Bean In a way that The Ice Shroom Activates at a time where the jacks are at a safe distance where they cannot blast the gloom and at the same time they can still be hit by the Glooms. Normally This can take care of the Inner rows.
Another way is by using Doom Shrooms and that's where the 4-Slot Doom Shroom Strategy helps in clearing out most of the jack-in-the-box Zombies that appear every wave every 50 seconds.
usually, unslowed jacks move along with the zombonis so squash and cherry bombs that were used to take care of the zombonis can also hit jacks.
There are tons of creative ways to deal with jacks in a cobless setup formation and sometimes you just need to experiment a little.
pros
having some active ways to eliminate jacks are really a good way to make sure you won't be bothered by jacks and is sometimes better than relying on attacking plants only.
since there are only 4 plants that are somehow "in danger" of being blasted by jacks and they are placed where there are less likely to explode when unslowed then this actually makes jacks much much more easier to handle.
they need to get past Doom shrooms, Ice shrooms, Puff shrooms, squash, cherry, flowerpot/spikeweed/garlic combined with slow from winterpults and DPS from gloom and fume before they can somehow get near to even blast one gloom due to the fact that they somehow need to walk past the middle of slot G5 and G2 before they can somehow deal some serious damage.
as long as i somehow properly handle every wave of jacks then i'm OK, the worst i was able to encounter was jacks blasting the pumpkins of the glooms on G3 and G4.
cons
you need to pay attention on almost every wave in order to keep the setup safe
doom shrooms can be blasted by jacks and that also includes all the other instants, so always be ready for the worst case scenario.
sometimes it is really difficult to spot jack-in-the-box zombies especially is there are too may zombies
backup strategy
you may use the music that the game plays whenever a jack enters in order to time their movements
you may add spikeweeds, Fume Shrooms or even garlic to your strategies, just be creative :)
Ice Shroom, Doom Shroom, Puff Shroom, Flowerpot, Spikeweed, Fume Shroom, Cherry Bomb, Squash, Spikerock, Pumpkin and Garlic. These are the plants that i use in order to get rid of jacks.
Anti Giga-Gargantuar Strategy[]
Usually called by the name "Gigas". These walking crushers of doom can Tank Huge amount of damage and can just crush whatever it is on their Path.
based on the overview of the setup; The setup's DPS alone cannot Handle Gigas or Gargantuars. So how is it that it can handle even these tough guys?
Overall lets see the Possible weaknesses of a Giga-gargantuar
their attack is slow although they only need to smash a plant once ( except Spikerock )
their movement is definitely manageable ( not too fast and not too slow )
even with very high HP they are simply 2 instants away from a Gargantuar
they can be "distracted" especially when you plant another plant in front of them when it is timed right
Here some of the Possible Strategies that will help you Handle Them based on this Setup.
Puff Shrooms works best on delaying them and is very cost-effective
flowerpots will work almost the same as Puff Shrooms
Doom Shrooms every 50 seconds helps a lot in Hurting Gigas
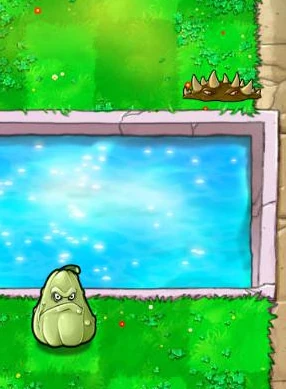
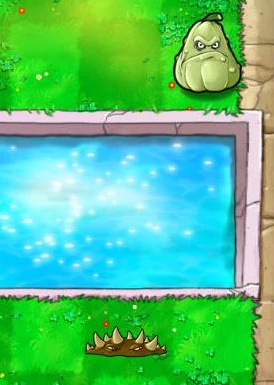
squash can be used to take down groups of gigas and good against Zombonis as well
spikeweed can be used to eliminate groups of Zombonis and delay Gigas as well
cherry Bombs can be used to clear out the upper half if there are too many Zombonis and Gigas that are present
Ice Shrooms are used when most of the Instants are recharging. This helps on somehow reducing their recharge times
Pumpkin removal Trick. You remove the pumpkin from a gloom right before the Giga Gargantuar Smashes the Pumpkined Gloom. Not only will it distract gigas but save the gloom as well
since we now have the possible strategies it will now matter on timing
I always use Doom shroom at 1st in order to maximize it's DPS for the whole round.
puffs, spikeweed and flowerpots should be the one to gather most of the gigas usually in the spot with highest DPS and distract them in order to keep the frontmost plants safe against them.
Squash will be the one to take down most of the gigas that are gathered up in one spot and since they have a very fast recharge time ( for an instant ) then squash is also used to help Doom shroom have a safe spot in the Pool and usually Squash is used anywhere it can and anytime squash is ready.
Cherry Bomb will be the one to protect the upper half against Zombonis and gigas ( especially if there are too much Zombonis because Fire peas lose their splash damage on Zombonis
Ice shroom will be the one to slow everything and stall gigas even more in order to give more time to damage the gigas or when you are waiting for other plants to recharge.
Pumpkin removal trick is very dangerous especially if you missed the timing on removing the pumpkin because gigas may smash both the Pumpkin and Gloom especially when you forgot to pay attention to the gigas that are approaching the glooms.
Pros
Gigas are very easy to handle especially if you just keep on delaying them until you can throw some instants at them.
most strategies that are used against Zombonis also works with Gigas.
Cons
Doom shroom's 4 slot rotation must be maintained and this can be a hassle especially if there are a lot of Zombies in the pool
both Distracting gigas and pumpkin removal trick are very risky especially when used at a spot where Gigas can hit the frontlines.
Gigas usually block Jacks so its hard to spot jacks especially if Gigas are around.
Backup Strategy
if things get messed up always use an ice shroom to save your plants and at the same time give more time for instants.
don't focus too much on Gigas. never leave your plants located in the leftmost empty spots unattended especially on rounds with Diggers
Digger Zombies, Dolphin Riders and Pole Vaulters[]
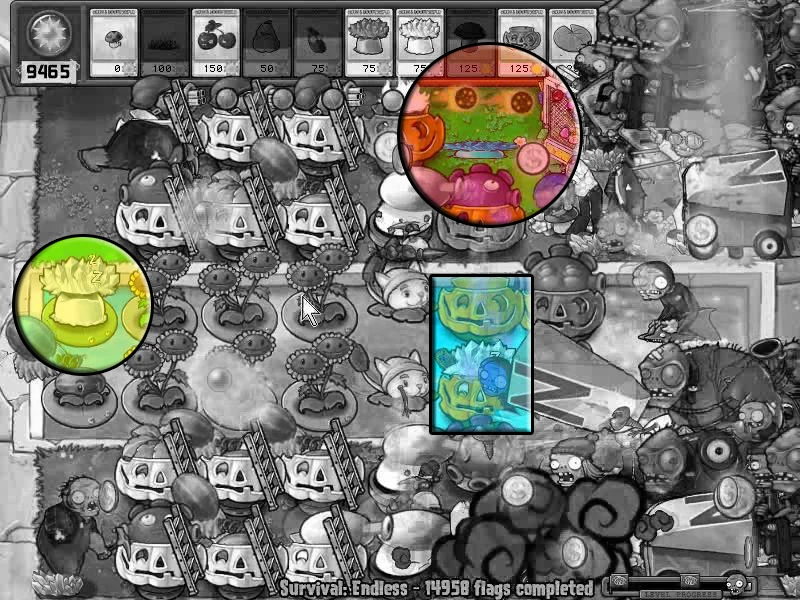
The Typical arrangement. 1 extra twin and 2 slots dedicated for ice shrooms
These Zombies pose a threat because they Limit the available empty spaces that can be used or maintained for a certain round and can really affect the strategy because you somehow need to adjust a few things especially for them.
we can see that there are 7 available extra slots that can be used for either Twin Sunflowers or Ice Shrooms.
But on rounds that has Diggers, Dolphin Riders and Pole-Vaulters these extra spaces can be either an asset or a liability if they are used.
Here we can clearly see that Pole-Vaulting Zombies can reach the glooms located at F2 and F5 and that can be a hassle especially on rounds with both Zombonis and Gigas. I use Puff Shrooms to delay Gigas but if i somehow delay them at a point where Pole-Vaulters are just one tile away from F2 and F5 then delaying the Gigas with Puff Shrooms will also cause Pole-Vaulters to jump on the Puff shroom and reach those glooms at F2 or F5.
Also The Ice Shroom Located at F1 causes the Pole-Vaulters on row1 to reach the Torchwood and that can be a problem too especially if Zombonis are just behind them.
Flattened Ice Shroom
stacking up too many Ice shrooms can be a hassle sometimes because sometimes we have a very limited space to place Ice shrooms and also sometimes we might forget about some.
Here I was concentrating on the Lower Half of the setup That I totally forgot about that Flattened Ice Shroom at F1
Sometimes i can stack up too much Ice Shrooms that usually most of them are most likely to be misused or eaten by diggers
No Ice Shrooms left is the result of series of mistakes made one after another and is definitely a bad thing because i would now have to rely on puffs and squash in order to fix the problem
Some reminders:
A3 is technically safe because only Bungee Zombies can somehow remove the plant at the spot Therefore on rounds with Bungee Zombies it is best to use the Ice shroom locateed at A3 in order to freeze Bungees.
A1 and A2 are both not safe against Digger Zombies, Bungee Zombies and Catapult Zombie
A5 and A6 are both safe against Bungee and catapult Zombie
F3 and F4 are both not safe against Dolphin Riders
Use the empty slots in a very creative way .
Summary[]
Doom Shrooms every 50 seconds help boost DPS on all lanes ( needed for gigas ) and clear out a lot of zombonis which help out all lanes especially the fire-pea lane
placing buffer plants can be a hassle because pole vaulting zombies can somehow reach them and jump over to the next plant ( usually a gloom or torchwood ) so pumpkin should always be ready to protect the glooms no matter what
constant ice shrooms in order to reduce the cooldown of the other instants and help glooms deal more damage and keep the gigas all pinned and slowed on a certain location
Squash should be the one responsible on helping the doom shroom have a save spot on those pool lanes and squash will also be the one to add extra dps on certain lanes on certain times.
cherry will be a backup if in case gigas and zombonis start to reach the buffer zone for puffs .
puffs and spikeweeds will be the one to protect the frontlines against gigas and Zombonis
placing buffer plants can be a hassle because pole vaulting zombies can somehow reach them and jump over to the next plant ( usually a gloom or torchwood ) so pumpkin should always be ready to protect the glooms no matter what
Always have at least one Ice shroom reserved for the next round.
This Setup was a result of different setups that I used one after another
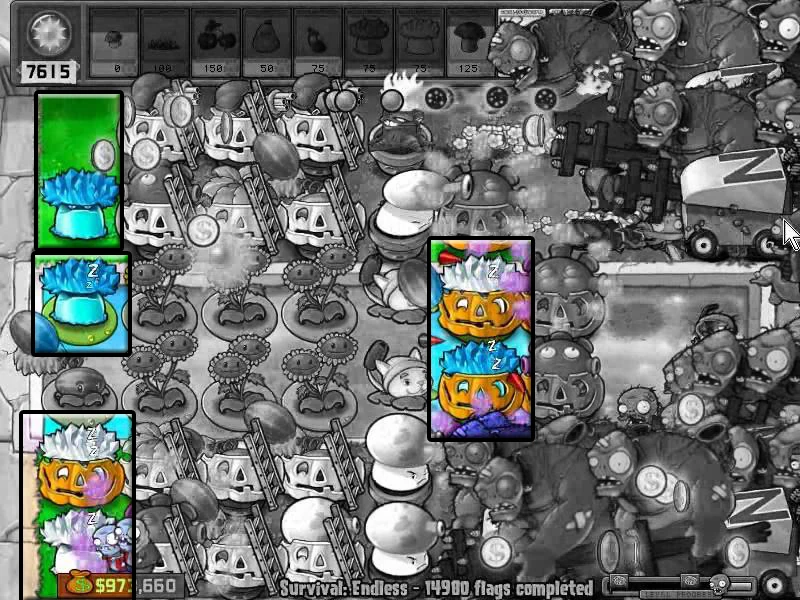
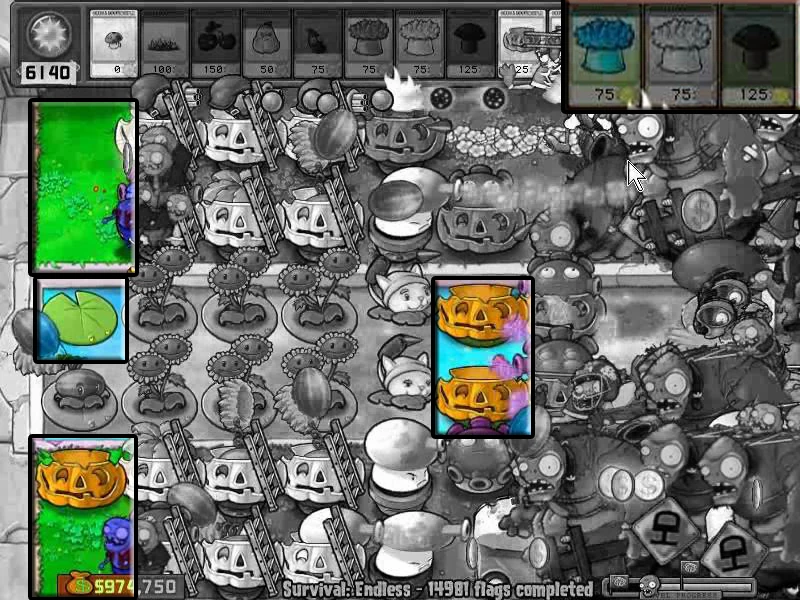
The Idea came from draco89123 as I was trying to find a much more challenging setup every now and then. I was able to construct the setup at around flags 143xx flags and it was after transitioning from a much safer setup that has four pool glooms instead of two.
So The flags merely tells how far I was able to sustain a cobless strategy while using setups that gets more and more challenging every now and then.
the 4 Pool Gloom strategy was already stable for me because i can already cycle the 4 doom shroom spots and somehow keep both outer lanes safe.
That was the time when i was thinking of going for an All-in pure Instants strategy which i never thought would be very successful in the end. back then i thought that a strategy that uses only instants and a setup that needs not to be repaired was a joke.
then again here are what my efforts and time spent on playing these game almost every night and studying my own recordings and analyzing certain strategies for certain rounds and situations go.
I want to share the strategies so that others can be able to use it on their own setup and come up with a better strategy on their own.
The setup itself had been broken countless times already but i was somehow able to keep certain a certain "core" setup within a setup alive which makes these strategies applicable to almost any cobless setup out there.
and after all those stuff that happened on that lawn for about 15k flags then everything will always come down to a very simple strategy.
The core of this setup is none other than.
Draco89123's Elegant cobless setup
Thank you so much draco89123 for this Elegant Cobless Formation. i literally based almost every strategy i use on this setup. thank you so much


